


Want to bring your Apple Silicon Mac back to its former glory? Time Machine can help, but here’s the catch: you can’t use macOS while it’s restoring. So, you’ll need to restore your computer from within Recovery Mode. Let’s break it down step by step!
- Power down your computer if powered on.
- If your Time Machine backup is stored on an External USB hard drive, plug it into your computer.
- Press and hold down the power button until you see the Options screen.
- At the Option Screen use your mouse point to highlight the Options icon.
- When the Continue button appears, click on it with your mouse pointer.
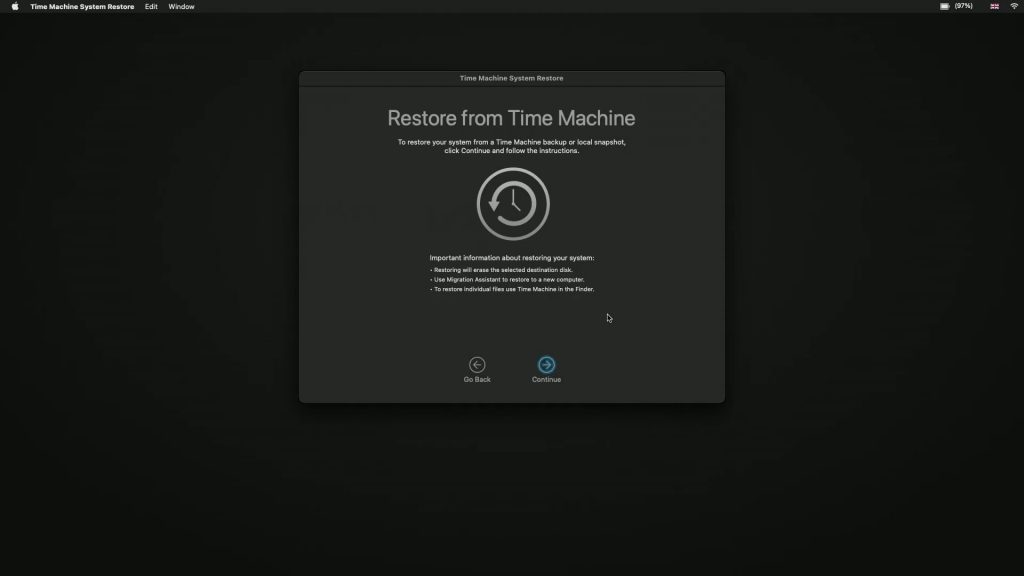
- You will now see four options. Select Restore from Time Machine.
- A wizard will appear to help guide you through restoring your Mac. Click Continue.
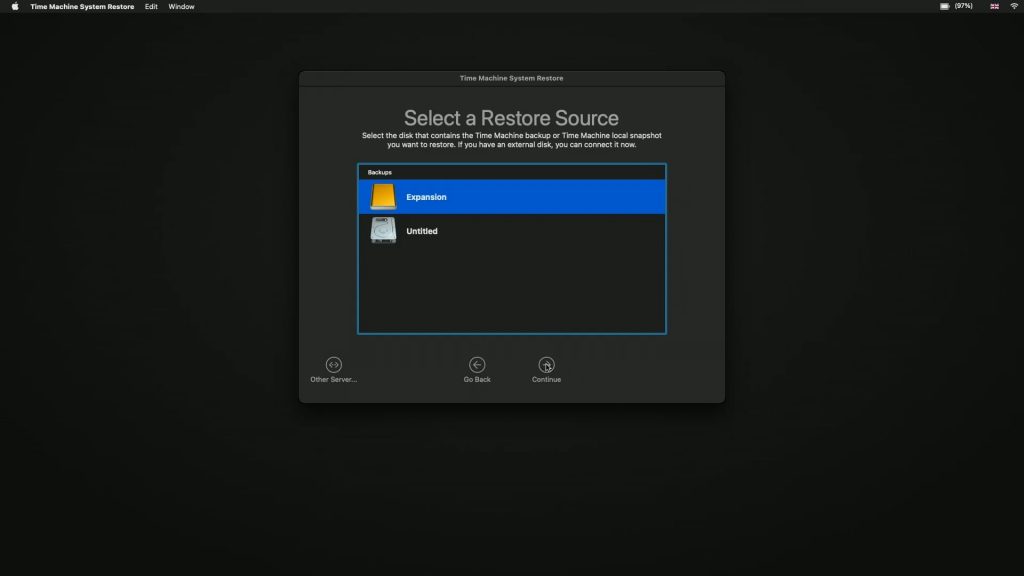
- The software will search for a Restore Source. This could be the USB hard drive you plugged in or a snapshot stored on computers hard drive.
Note: If your Time Machine backup is stored on a network server. You can browse for it using the option Other Server.
- When you choose Restore, your computer will use your Time Machine backup to restore itself back to a previous state.
- From the list of backups that are displayed choose the backup you want to use and click Continue.
- Choose from the list the backup you wish to restore from Time Machine.
- After choosing Continue you will need to select the drive you wish to restore to. In most instance this will be Macintosh HD.
- Amazon store link – WD Elements External USB hard drive.
- mydoodads article – Restore an Intel Apple Macintosh computer to a previous state using Time Machine.
- mydoodads article – A beginners guide to setting up a Synology router | Time Machine backups.
- mydoodads article – Synology BeeStation | Time Machine backup.
- Apple article – Use macOS Recovery on an Intel-based Mac.
- Apple article – User macOS Recover on a Mac with Apple Silicon.